Addon Model Creation Example
This section will briefly run through the steps involved in creating an addon model for Hyperdeep using a practical example.
Model Sourcing
The most common reason for adding extra customization content to Hyperdeep is to recreate existing characters from games, anime, etc., so we'll try and do that in this tutorial.
If we choose a character from a game, there's a good chance that somebody will have already ripped the 3D models and textures for that character and uploaded them online, which leaves a lot less work for us to do. A particularly good resource for this kind of thing is The Models Resource.
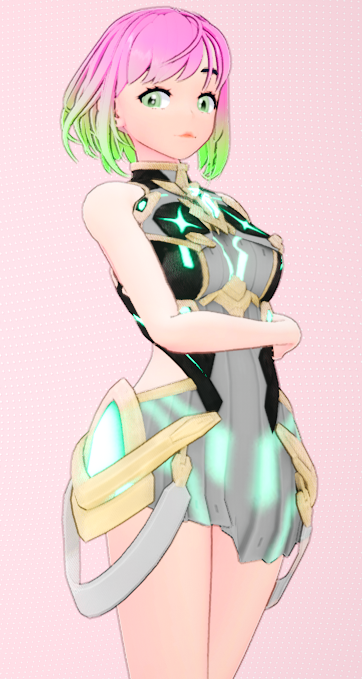
I happen to know that all of the character models from Smash Bros. Ultimate are available on the Models Resource, so let's choose Mythra and make an addon from one of her clothing items.
Clean-up
Models ripped from games are generally left pretty "raw". Different parts of the mesh are often separated, or duplicated, or have several different versions included. For this reason the first step of this process is always clean-up.
When we import our model we get this:
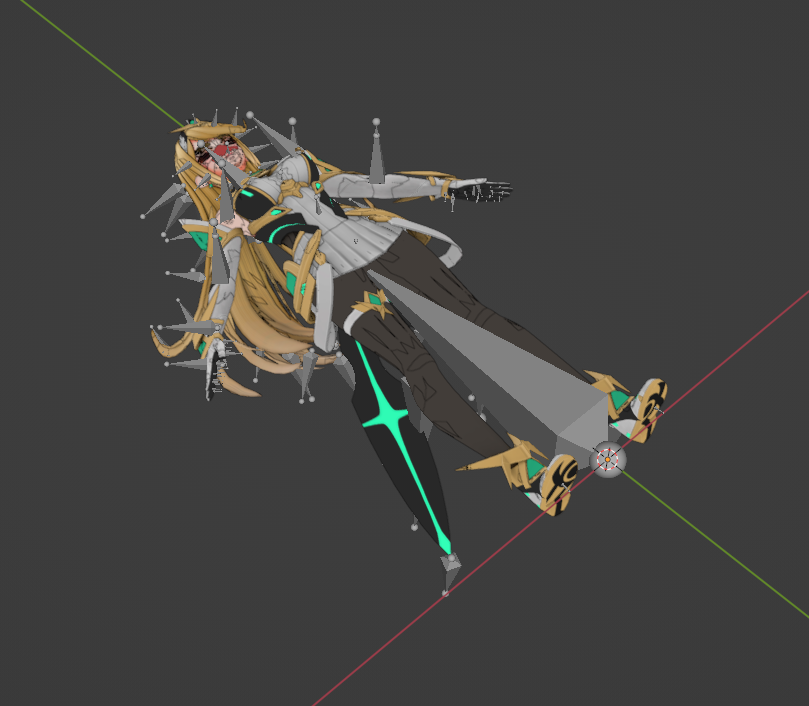
The first thing to notice is that this model comes with a skeleton already. This is great if you want to become a porno animator, but no use to us because we want to use our own skeleton. Lets get rid of the skeleton and stand her upright:
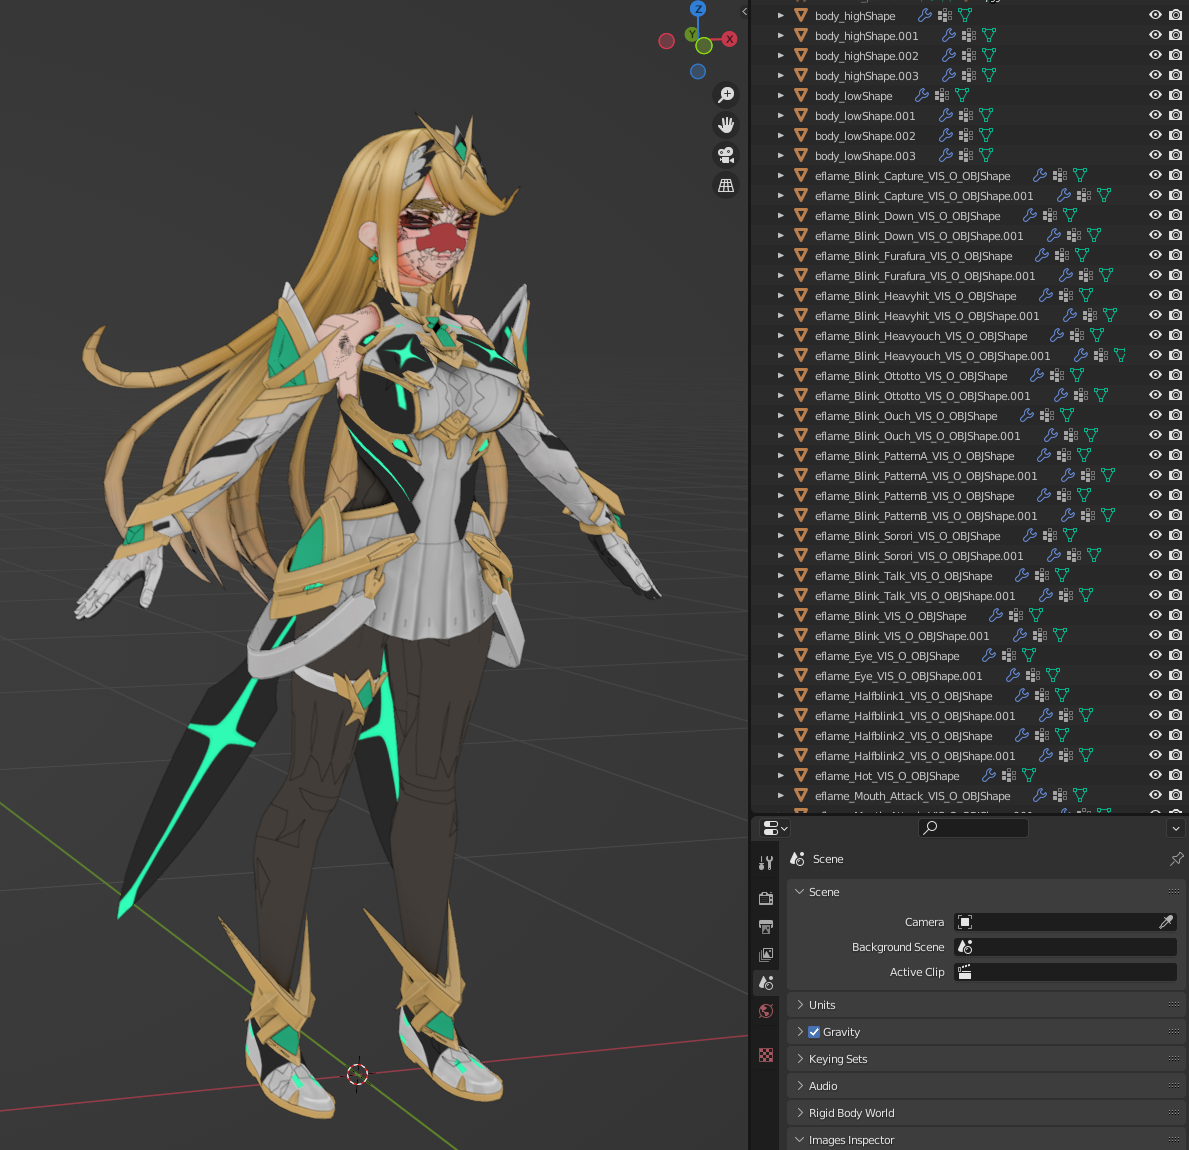
We can see that there are a shitload of different meshes making up this model, so lets delete all of the ones that we definitely don't need. We're interested in clothing today, so lets get rid of everything but the clothing:
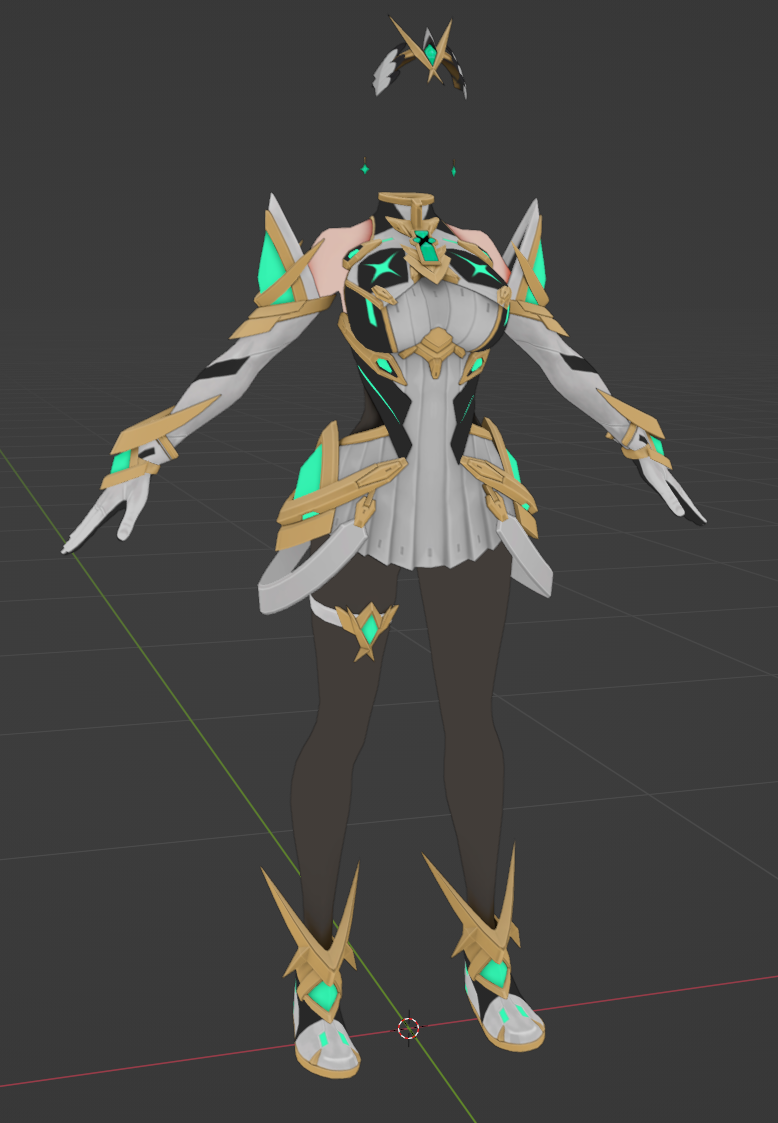
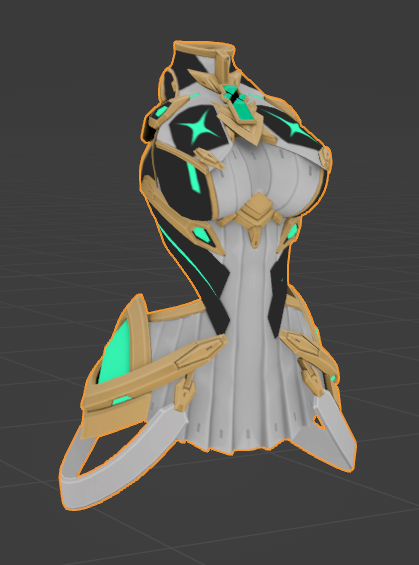
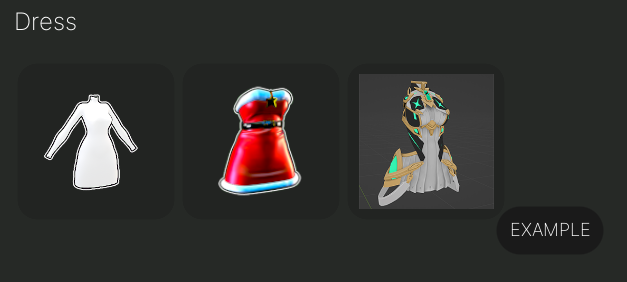
Alright now we're getting somewhere. Now comes the time to decide what part of the clothing we actually want to use. How much a single addon contains is up to you; we could make the entire outfit a single addon and import it all in one go (easier), or we could split it up into separate pieces (more flexible). For the sake of expediency, in this tutorial we'll just do the dress:
Fitting
Ladies come in all shapes and sizes, and so it's pretty unlikely that any item we import will actually fit HD-chan without some modification. To help us get the fit just right, we can use the HD-chan mannequin.
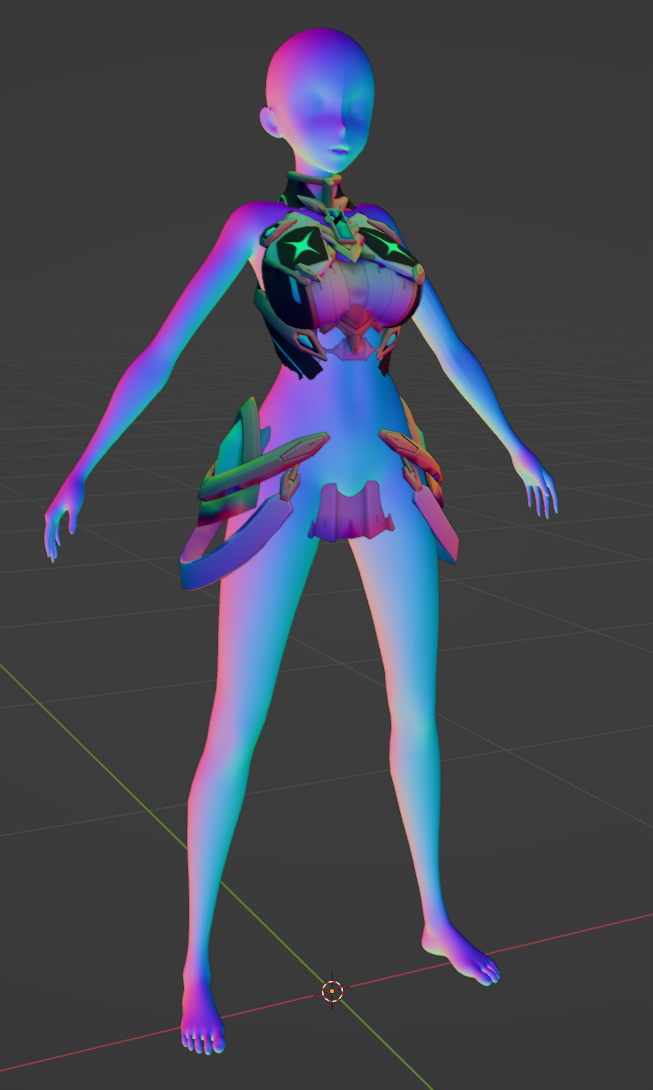
We actually got pretty lucky this time as the scale is quite close, but we can see that there are many areas where the dress shape isn't quite right. In order to correct this, we'll need to modify the dress mesh. One important thing to remember when doing this however is that we don't want to change the topology, as this will break the texture mapping. My preferred method is to use sculpting tools (with any retopology functions turned off) to push and pull the mesh into position:
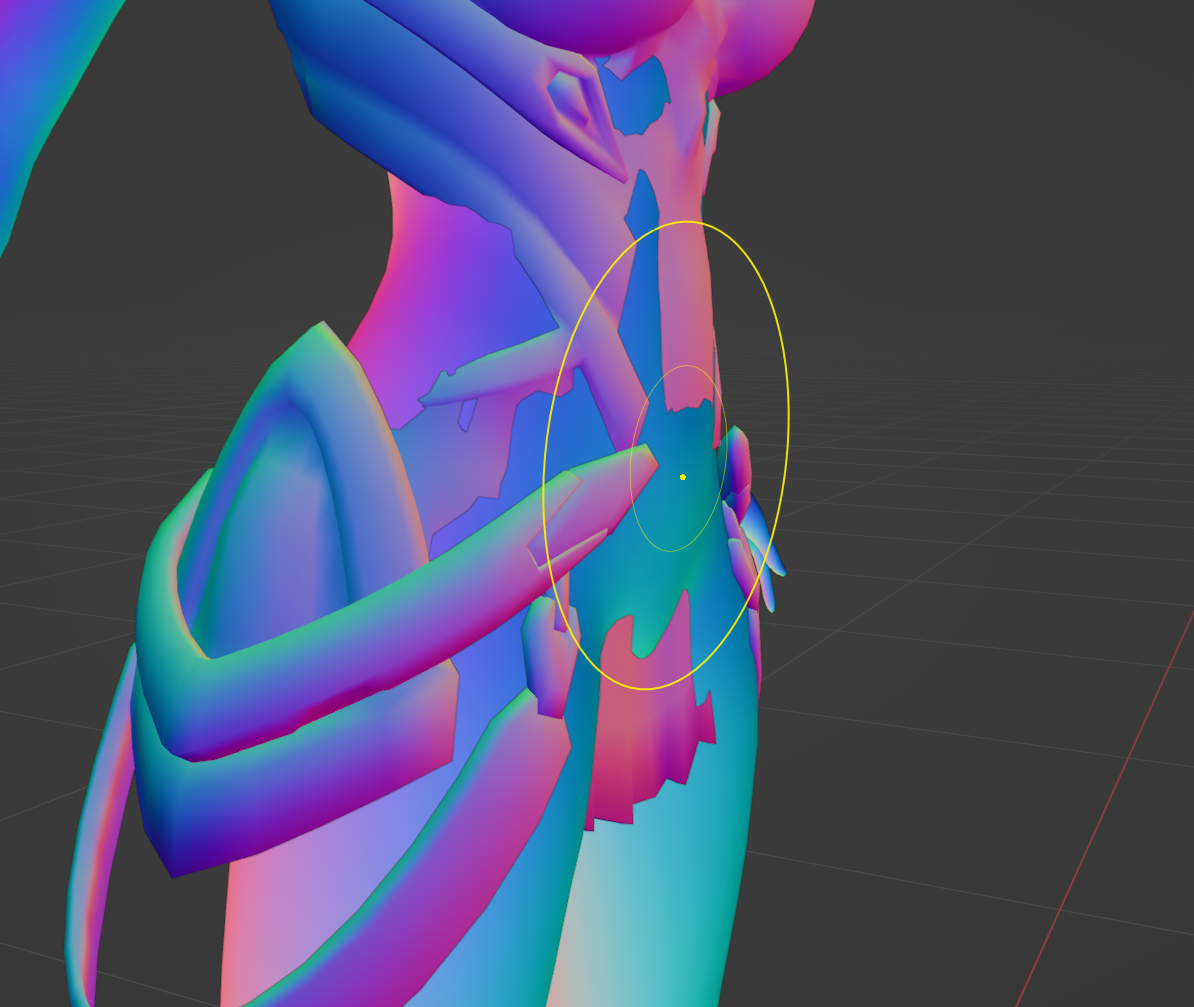
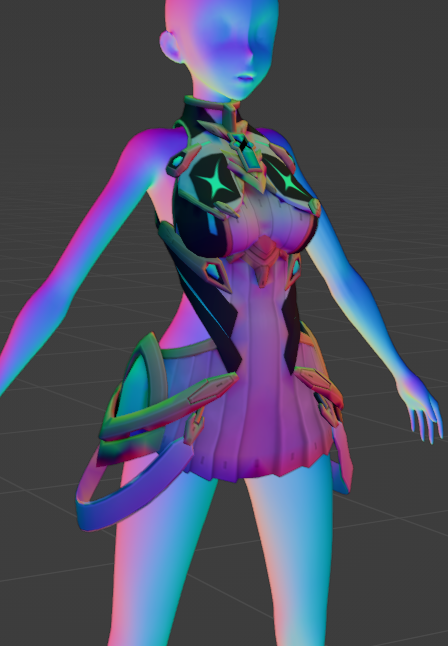
Be gentle and take it slowly, and eventually you should be able to conform pretty much anything to HD-chan's voluptuous figure:
Weight Painting
Now comes the step that has the greatest potential to be annoying: weight painting. Weight painting determines how the different parts of our mesh will move along with HD-chan's body parts (e.g., when HD-chan lifts her left leg, we want the left side of the dress to move with it but not the right side, and so on).
Often, the simplest way to at least get started with this process is to transfer the weights from the mannequin to the addon mesh, causing the addon to take on the weights of whatever part of HD-chan's body is closest to it. The closer an addon sits to HD-chan's skin, the more applicable this method will be.
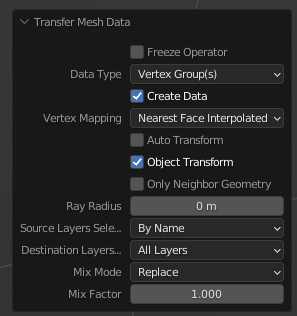
To perform this transfer process in Blender (although the same thing can be achieved in other software) we first parent the mesh to the mannequin skeleton (without generating any automatic weights). Then we select the mannequin mesh and the addon mesh (so the addon is the primary selection) and enter weight paint mode. Select Weights > Transfer Weights and use the following settings:
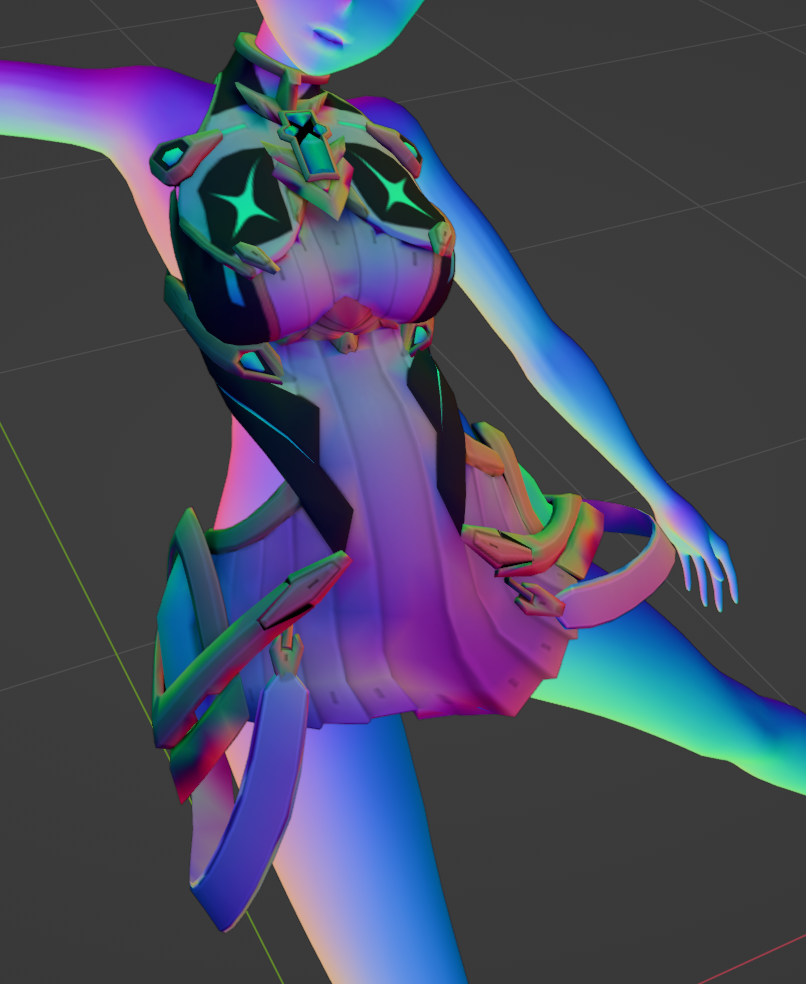
In our case, because the dress is quite form-fitting, this process gives us a good result almost immediately, and our weights require only minimal manual cleanup. One step that is basically always applicable when starting from these automatically transferred weights is applying a few iterations of smoothing to all the vertex groups, to get rid of any sharp transitions.
Move the mannequin skeleton around a bit to test how the weighting looks in various positions. Once it looks good we can move onto the next step!
Materials
Next we need to sort out the addon materials. Models ripped from games often have lots of material slots that aren't actually relevant to the part that we're interested in, which is true in our case:
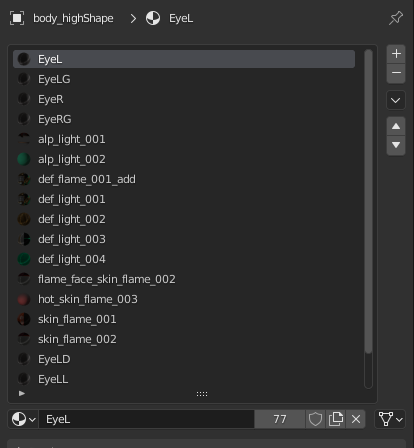
Hyperdeep supports addons with up to ten material slots, but for ease of use its in our best interest to try and use as few as possible. After going through and checking each material assigned to this mesh, we determined that only two were actually having any effect: one for the main body of the dress, and one for the little gem details.
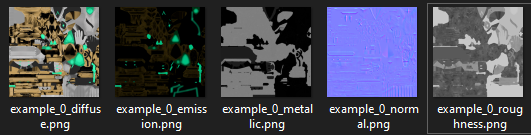
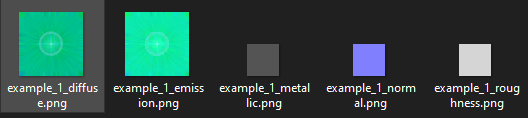
Textures will generally come packed with ripped models as separate image files. Naming conventions vary wildly so the easiest thing to do is inspect the materials in our 3D package to determine which textures are assigned to what. As a word of warning, Blender will generally not automatically import all relevant textures (things like emissive often get overlooked), so make sure to check through the files to see if there are any extra textures we can use.
After sifting through and renaming our textures (and converting them to .png files if they aren't already), our texture sets look like this:
Now that our materials are set up we're almost done!
Export
When exporting any addon, make sure to select both the mannequin skeleton and the mesh itself. We export as a .fbx file regardless of what format the model originally came in, and we don't bother packing in material textures, as the game will import these separately regardless.
Config
Finally we need to write the config file for this addon. Thankfully this is a very simple process and our resultant example.json looks like this:
{
    "category": "dress",
    "viewoffset": "1",
    "hair": false,
    "bra": true,
    "shoes": false,
    "shoe_platform": "0",
    "shoe_angle": "0"
}
Easy! We choose to set bra to true because this dress looks like it's pretty supportive.
Thumbnail
In order to identify our addon more easily we can include an example.png that Hyperdeep will use as the addon thumbnail.
Import into Hyperdeep
Place all of the files (model, textures, config) together into a folder, and then place that folder somewhere under [game root directory]/HDT/Content/Addons/. With that done, the next time we boot up Hyperdeep our addon should appear in the designer menu!
Select it like you would any other clothing item and we can finally see the fruits of our labor: